
USER MANUAL
Complete viewing required: every step is crucial to obtain results
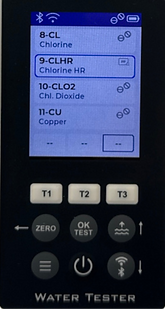
Chlorine HR (Kl): 5 – 200 ppm (mg/l)
Use Tablet Reagents Chlorine HR (KI)+Acidifying GP Powder Pillow
9-CLHR
Step-1
• Make sure the measuring chambers are clean beforehand.
• Rinse them with the water you are going to test.
• Turn on the Water Tester using the power button.

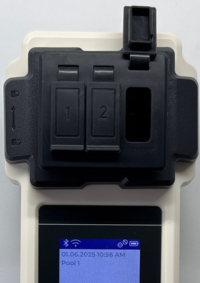
Measuring chamber
Power button
Step-3
• Cover the measuring chamber with the light protection cap.
• Press the ZERO button.
Light protection cap
ZERO button

ZERO
Step-2
- Fill the cuvette directly from the water source you are testing.
- Insert the Water Leveler into the chamber.
- Excess water will drain via side channels, leaving exactly 10 ml in each chamber.
Please note that you do not necessarily need to submerge the photometer in water to fill the cuvette with water. You can use a mug first, and then use the Water Leveler to remove any excess water.
Water Leveler


Step-4
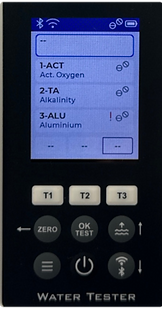
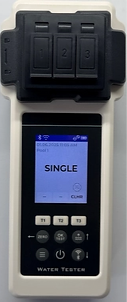
• Press the T3 button to go to the selection menu for the test parameters.
The T1/T2/T3 button functions:
– Single click: add a parameter.
– Double quick click: remove a parameter.
– Long press (count to three): open the parameter list.

Step-5
Use the up and down buttons to select the desired parameter for measurement.
Up and down buttons
Step-6
• After selecting the desired parameter, click the OK button to confirm your selection.
OK button
Step-7
• Add the reagent to the chamber you are going to perform the test in.
• Pour the contents of the bag into the chamber, in this case, into chamber №3.
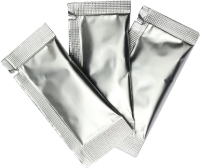
Add 1 bag of Acidifying GP
Step-8
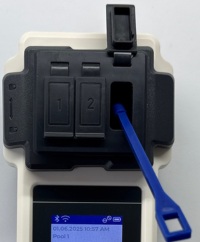
• Using a special stirring stick, first crush the pressed reagent tablet, and then stir until it is completely dissolved.
Special stirring stick
Step-9
• Add the reagent to the chamber you are going to perform the test in.
• Pour the contents of the bag into the chamber, in this case, into chamber №3.
Add 1 bag of Chlorine HR (KI)
Step-10
• Using a special stirring stick, stir util it is completely dissolved.
Special stirring stick
Step-11
• Cover the measuring chamber with the light protection cap.
• Press the T3 button to start the countdown.
Light protection cap
T3 button
Step-12
• Press the OK button, wait until the countdown ends and the test results appear.
Ok button

If you want to upload the test results to the cloud, press the Back button (which also functions as Zero). The word “Test” will appear on the screen — then press the Bluetooth/Wi-Fi button.